- Navigate to “fields”.
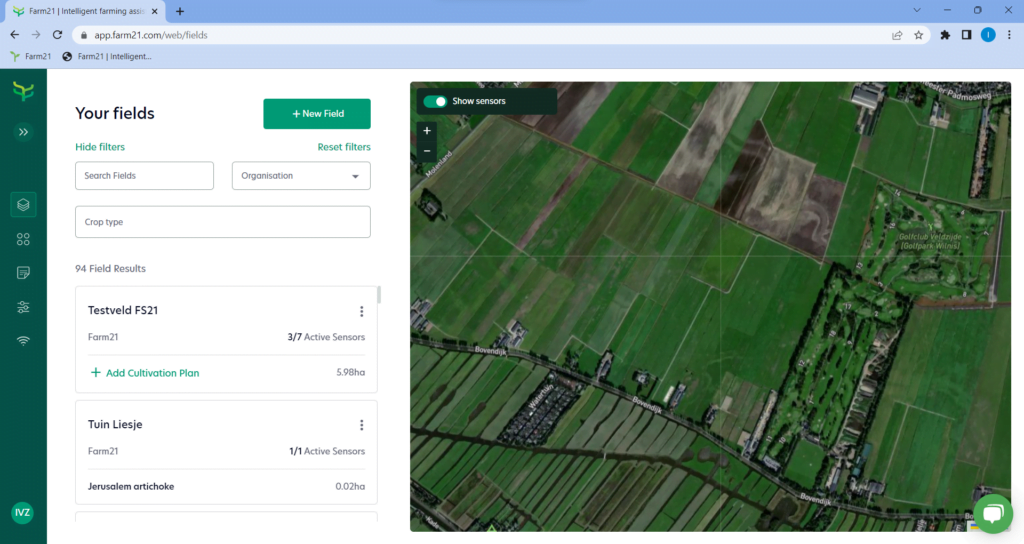
- A new page will open with a map (figure 1). Locate the area on the map where your sensors will be located. You can do this by clicking on the map and moving it so it displays the correct area. You can also zoom in and out using ‘- and +’ signs. Once the desired area is in view, click on ‘+ New Field’.
3. An additional window will have opened where you can enter your field (figure 3). Enter the field name in the block under ‘Field Name’.
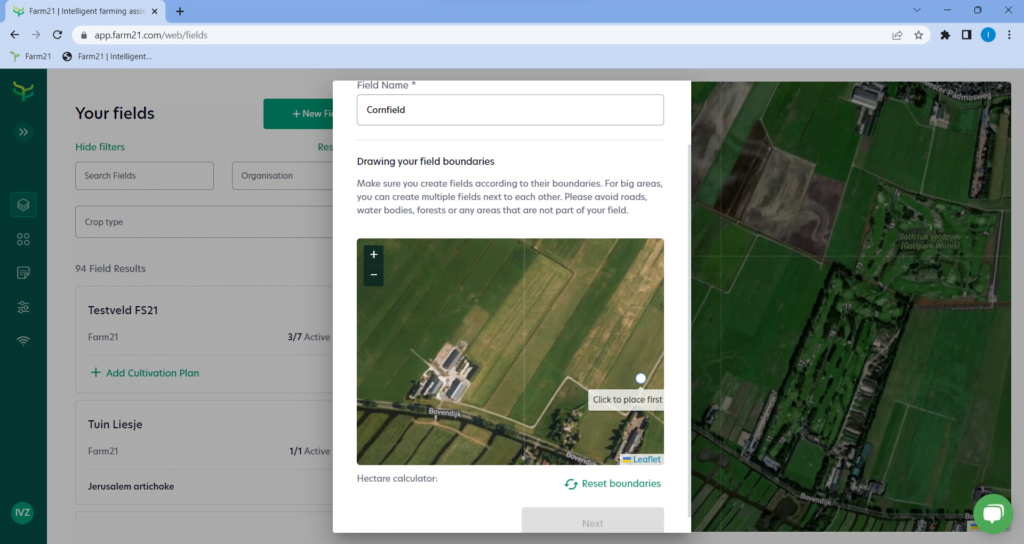
4. The area you just looked up on the map is also shown here again. Zoom in on the field that has to be drawn.
5. A white dot will appear as you move over the map. Go to a corner of the field you want to draw and click on it once to lock it.
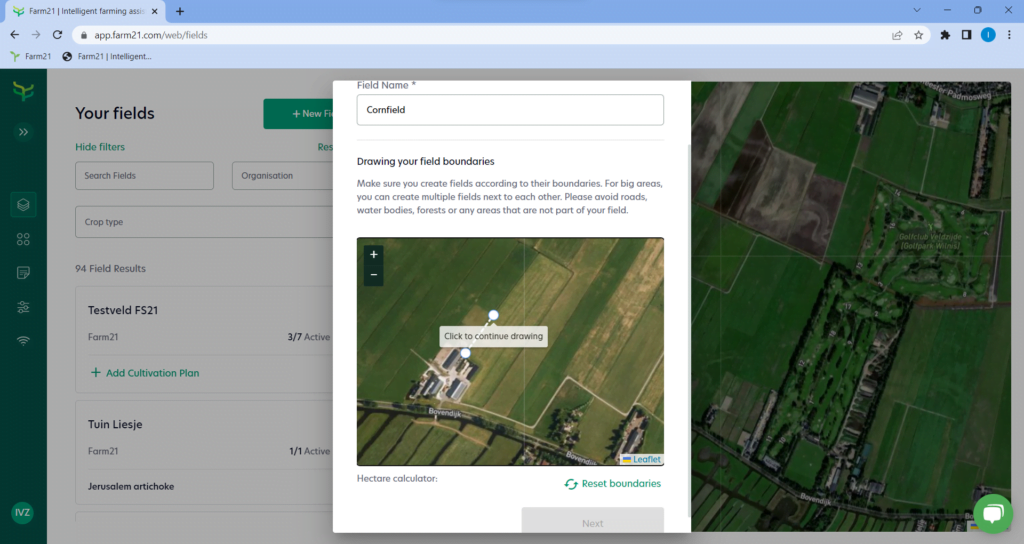
6. Now, move to the next corner and click on it to lock the dot again. Do this on all corners of your field until you get back to the starting point. You’ll see clearly where the boundaries of the selected field are. Make sure that the selected area is correct and click ‘next’.
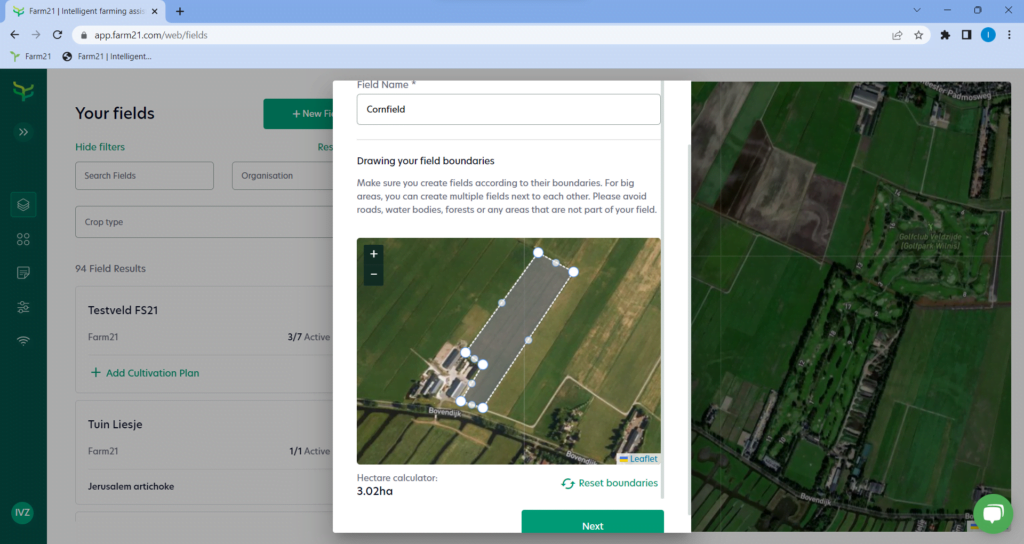
7. Fill in the blocks that are marked with the ‘*’ symbol and click “next”.
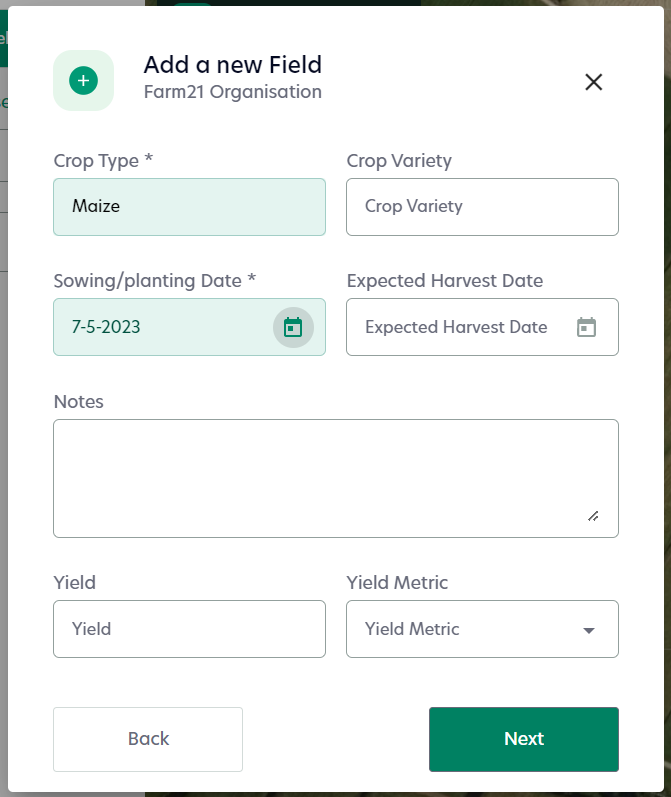
8. Now you can fill in the soil composition. If you have done a soil sample test, you can enter the percentages of the types of soil. Be aware that the soil type percentages has to be a sum of 85-105% total.
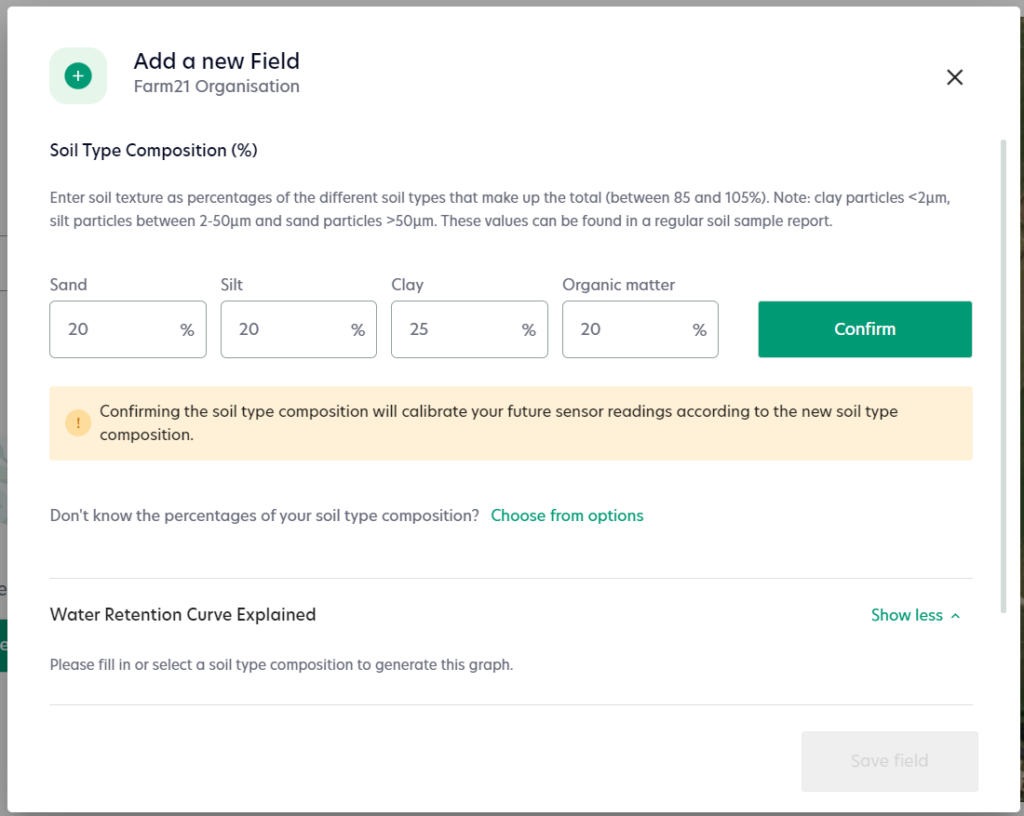
9. If you do not know the exact percentages you can click “choose from options”. Choose the main soil type by clicking on the dropdown.
10. Click on “confirm”. Scroll down for extra explanation about the water retention curve and thresholds adjustments for your soil type.
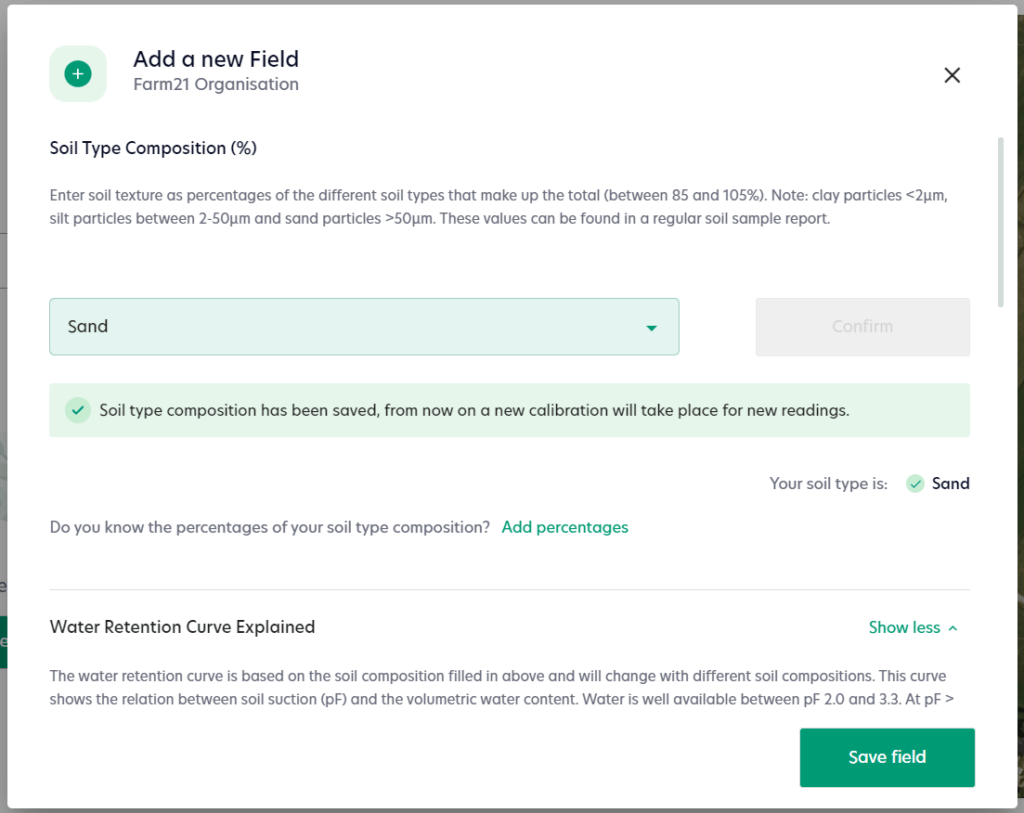
11. Click on “save”. Congratulations! You have just added a new field.
